As I sit and type this post, the second annual Baeumler Family Foundation Celebrity Gala, a charity event hosted by none other than HGTV superstar and Mike Holmes' good friend Brian Baeumler, is in full swing. The event is taking place tonight at the Ritz-Carlton Hotel in Toronto. Mike was in attendance last year, and he's no doubt put on his best suit and dancing shoes for the event this year. I can't wait for the photos to start pouring in via Twitter and Facebook!
From the Baeumler Family Foundation website:
"The Baeumler Family Foundation provides renovations for children and families in need of accessibility, safety, and security to create a nurturing and positive home environment."
For more information about BFF, visit http://www.baeumlerfamilyfoundation.com/.
Here's a video of the event from last year. Count how many times you spot Mike! And I'll be sure to post any photos I find.

Thursday, May 22, 2014

Wednesday, May 21, 2014
Gardening Guidance From Mike Holmes
Last week, Canadians like Mike Holmes enjoyed a three day weekend. Similar to Memorial Day in the US, Victoria Day weekend is the kick-off to summer in Canada. Many Canadians took advantage of their extra day off by catching up on a little home maintenance and starting a project or two, such as touching up the landscaping around their properties. If you plan on doing a little gardening any time soon, Mike Holmes has some tips and pointers to start it off right. First, before you start any home improvement project, make sure your home, roof, windows, and the like are all in good shape. There's no point in starting a pretty garden if your roof needs to be replaced -- roofers will have to trample your pretty petunias and all your hard work will be for naught. Long story short, make sure you address all major home repairs first before working on anything aesthetic. So, you've inspected your property, and everything survived the winter intact. What's next? Make sure that you pick the right kinds of plants and trees for your property, as well as for your skill level. If your front yard is the place that plants go to die, stick to low maintenance (and perhaps drought tolerant) plants. Plant your plants and trees strategically away from foundations and neighbors homes. Follow some common sense rules and your yard will be the envy of the neighborhood in no time!
From the Montreal Gazette:
Mike Holmes: A little gardening guidance
Before you landscape, do a quick survey of the state of your home

The location of greenery on your property is more important than your selection of plants. Make sure landscaping projects don’t lead to expensive repairs.
It’s been a long and brutal winter, but it’s finally Victoria Day weekend — the official start to barbecue season. Many Canadians will be firing up the grill, but not before rolling up their sleeves and getting dirty.
This weekend is one of the most popular weekends to do home projects, especially small outdoor jobs like landscaping and gardening. If you’re getting ready to gear up this weekend, here are a few things to keep in mind.
Before you buy landscaping tools, plants, grass seed and soil, take an inventory of your house.
Look at the exterior, including the roof, windows, exterior siding and foundation. Are there any new leaks? Any new cracks in the foundation, or have older cracks got bigger?
What about your windows? How does the framing and windowsills look? Are there cracks in the bricks, or are they flaking or spalling? Is there missing mortar?
These are things you — or the right pros — need to fix before you worry about making things look great on the surface.
When everything checks out, then you can start to think about investments — like landscaping — that will enhance the value of your home. Can you imagine spending time and money working on your yard and garden only to have it stomped and trampled by someone who is trying to fix the framing around your windows or sealing a crack in the foundation?
If you decide to do some landscaping this weekend, don’t plant anything next to your foundation. Every time you water the plants there you would be directing water right to your foundation.
Your house needs to breathe. If there isn’t enough space between your house and any shrubs or plants, moisture builds up, potentially leading to mould, termites and other insects. You don’t want to create the perfect environment for these types of problems.
And don’t forget about maintenance. How often do you need to water the plants you’re choosing? How often do they need to be pruned? If you don’t have a green thumb, get low maintenance greenery. You could save yourself a lot of money, time, sweat and tears. You’ll also be saving many plants.
If you’re planning to plant a couple of new trees, choose the right ones for your property and make sure you plant them in areas where they won’t damage your home or your neighbour’s. That means as far away from the house as possible and ideally away from the sanitary line.
Large trees have large branches and foliage that can direct more water to the house, including the roof, siding and foundation. This leads to more wear and tear. And remember, a tree’s roots can be two to three times wider than the tree. Find out how big the tree’s canopy can grow to be; its root system will be just as wide or wider.
Tree roots can do a lot of damage to your plumbing and weeping tile. If you have mature trees on your property, contact a professional plumber who can scope your plumbing lines to make sure there aren’t any roots causing damage to your underground pipes.
If you catch the problem early, you can prevent water or sewage from backing up into the house. I don’t know a single homeowner who wouldn’t want to prevent that.
Small landscaping projects are good ways to get outdoors and improve your home. But if you don’t know what you’re doing you could cause problems like messing up the grading or drainage around your property — or worse, your neighbour’s.
If you aren’t 100 per cent sure about something, hire a pro. It’s your safest bet.
Watch Mike Holmes on Holmes Makes It Right on HGTV. For more information visit makeitright.ca.
This weekend is one of the most popular weekends to do home projects, especially small outdoor jobs like landscaping and gardening. If you’re getting ready to gear up this weekend, here are a few things to keep in mind.
Before you buy landscaping tools, plants, grass seed and soil, take an inventory of your house.
Look at the exterior, including the roof, windows, exterior siding and foundation. Are there any new leaks? Any new cracks in the foundation, or have older cracks got bigger?
What about your windows? How does the framing and windowsills look? Are there cracks in the bricks, or are they flaking or spalling? Is there missing mortar?
These are things you — or the right pros — need to fix before you worry about making things look great on the surface.
When everything checks out, then you can start to think about investments — like landscaping — that will enhance the value of your home. Can you imagine spending time and money working on your yard and garden only to have it stomped and trampled by someone who is trying to fix the framing around your windows or sealing a crack in the foundation?
If you decide to do some landscaping this weekend, don’t plant anything next to your foundation. Every time you water the plants there you would be directing water right to your foundation.
Your house needs to breathe. If there isn’t enough space between your house and any shrubs or plants, moisture builds up, potentially leading to mould, termites and other insects. You don’t want to create the perfect environment for these types of problems.
And don’t forget about maintenance. How often do you need to water the plants you’re choosing? How often do they need to be pruned? If you don’t have a green thumb, get low maintenance greenery. You could save yourself a lot of money, time, sweat and tears. You’ll also be saving many plants.
If you’re planning to plant a couple of new trees, choose the right ones for your property and make sure you plant them in areas where they won’t damage your home or your neighbour’s. That means as far away from the house as possible and ideally away from the sanitary line.
Large trees have large branches and foliage that can direct more water to the house, including the roof, siding and foundation. This leads to more wear and tear. And remember, a tree’s roots can be two to three times wider than the tree. Find out how big the tree’s canopy can grow to be; its root system will be just as wide or wider.
Tree roots can do a lot of damage to your plumbing and weeping tile. If you have mature trees on your property, contact a professional plumber who can scope your plumbing lines to make sure there aren’t any roots causing damage to your underground pipes.
If you catch the problem early, you can prevent water or sewage from backing up into the house. I don’t know a single homeowner who wouldn’t want to prevent that.
Small landscaping projects are good ways to get outdoors and improve your home. But if you don’t know what you’re doing you could cause problems like messing up the grading or drainage around your property — or worse, your neighbour’s.
If you aren’t 100 per cent sure about something, hire a pro. It’s your safest bet.
Watch Mike Holmes on Holmes Makes It Right on HGTV. For more information visit makeitright.ca.
© Copyright (c) The Montreal Gazette
Tuesday, May 20, 2014
Mike Holmes on What You Need To Succeed In the Trades
Mike Holmes is all about getting young people excited about the trades. It's the reason why he's been so heavily involved with SkillsCanada and WorldSkills over the years, and why he continues to speak at colleges and conferences all around Canada in the name of promoting the skilled trades. Mike wants young people to consider getting into the trades as a viable and lucrative career opportunity, and not just a backup career if they can't find work elsewhere. In the interview below, conducted by OntarioApprenticeships.ca, Mike talks about his love and passion for the trades, and what it takes to succeed as a skilled plumber, welder, carpenter, and the like. He describes his line of work as challenging with long hours, but rewarding. He states that if you have a skill, chances are you'll never be without work because the demand for skilled tradesmen and women is high and growing with every passing decade.
Holmes On Trades: What You Need To Succeed
INDUSTRY PERSPECTIVE In this exclusive interview with host of Holmes on Homes, Mike discusses the importance of getting young people involved in the trades.
 Staying focused while working in the trades in one of the most important skills according to Mike Holmes. Photo credit: Alex Schuldtz, The Holmes Group
Mediaplanet: How were you inspired to enter the trades?
Mike Holmes: My dad. As a boy growing up, I would watch him work around the house, on neighbours’ homes. I was fascinated by what he could do, how he could take down walls or redo our home’s plumbing. I guess he noticed that I wasn’t going away, so he started teaching me when I was still really young. I wanted to know. For me, it was a totally exciting thing to do.
MP: Why should our youth get involved?
MH: It’s a great career. If you love it, you will go far. There’s good pay, and when you’re really good, there’s no telling how far you can go. The demand for tradespeople is huge, and it’s growing every year. So chances are, if you have a skill, you’ll have a job—and a good one. Being in the trades is an advantage. Having a skill is an advantage. It’s an investment you can’t lose.
“It’s time we have more respect for tradespeople, because we depend on their work and their skill all the time.”
MP: What is the most important skill that young people learn through skilled trades?
MH: Focus. Working in the trades takes many skills — not just one. Look at plumbing, for example. To be a plumber you need to know your math to make the proper cuts on your pipes. You need to know how to solder, how to make your fittings, how different materials react to different temperatures and environments — and you have to be precise, down to the millimeter. You have to stay focused. It can be frustrating, but when you get it, there’s nothing better.
MP: What is your best piece of advice on what youth can expect once they start their training?
MH: It’s not going to be easy. Working in the trades is hard work. It’s long hours, complicated projects, and you’re dealing with different people all the time. Sometimes a project might involve five different trades, so you need to know how their work affects yours, and vice versa. Communication is important, patience is very important, and sometimes you have to think ten steps ahead. But if you love it, there is no other option. I still love it, and it’s been over 30 years!
MP: How do experienced workers in the trades help young people that are just starting out?
MH: When you’re new or if you’re just starting out and getting a feel for it, it can be overwhelming. It’s a whole new world, and it helps just to have someone there to guide you. Someone that can talk to you about their experiences, dealing with different aspects of the job, materials, products and dealing with clients. Part of being a pro is teaching others. You never know how many people you help by teaching one person to do it right.
MP: What do you think people need to know about trades in general?
MH: It’s not a fallback career. Being a tradesperson takes many skills. You need to know all kinds of information on the spot, and from different areas. I know people who went to university first and then got into the trades because they couldn't get a job, and they say that learning a trade was harder than university. It’s time we have more respect for tradespeople, because we depend on their work and their skill all the time.
MP: What do employers get back from investing in training programs and apprenticeships for our youth?
MH: Well, there’s the tax credit. But more importantly, you get good work and good workers — people who care. Apprenticeships make good carpenters, builders, plumbers, electricians — you name it, because you work one-on-one with a pro. The experience of a pro is gold to an apprentice, and that builds integrity — integrity to your trade, to your skill, to your work, and to the people you help. Apprenticeships also build loyalty, and that’s priceless to an employer.
MP: Tools play an increasing important role in the trades, what is the most important tool in your tool belt?
MH: A tape measure is important. You need it for almost every job, but you can’t do anything with it without other tools. So I’m going to say my Stiletto hammer. I love it! It’s light, it’s powerful—I can hammer things with just one hand. The weight is properly balanced, and you don’t need much force to hammer something in. And a hammer is a multi-tool. You need if for demos and for building.
editorial@mediaplanet.com

Saturday, May 17, 2014
Mike Holmes Touring the Kinsmen Lottery Home in Saskatoon - Video
A couple of weeks ago on May 1, Mike Holmes was in Saskatoon promoting the Kinsmen Lottery Home, a $1.5 million home that was being raffled off to one lucky winner with the proceeds of the lottery going to various charities. From the photos on the website, the home -- a Holmes Approved Home built by Lexis Homes -- was absolutely gorgeous, complete with only the best and most energy efficient and environmentally friendly features. For more information about the Kinsmen Lottery Home in Saskatoon and Mike's involvement, see Mike Holmes At The 2014 Kinsmen Riverview Lottery Home . A few days ago on the Lexis YouTube page, this video was posted of Mike Holmes touring this beautifully built home.
"Mike Holmes tours through the Kinsmen Riverfront Lottery Home with Cam from Lexis Homes and Brent Loucks. During the tour, they not only discuss what makes it look great, but what makes it BUILT RIGHT."
"Mike Holmes tours through the Kinsmen Riverfront Lottery Home with Cam from Lexis Homes and Brent Loucks. During the tour, they not only discuss what makes it look great, but what makes it BUILT RIGHT."
Friday, May 16, 2014
Mike Holmes In a Fireman's Uniform
These photos need no description...


 The pictures were taken today at the Fire & Emergency Services Training Institute. Do you think Mike would make a good fireman? I don't know, but let's just say Mike can come and rescue me any day of the week.
Thursday, May 15, 2014
Building Safety Month: Radon
May is building safety month, and being that making it right means making it safe, Mike Holmes has been Facebooking and Tweeting various safety article from his website. Today, Mike Holmes posted an article pertaining to an odorless, colorless radioactive gas that kills thousands of people every year: radon. Where does radon come from? Long answer short: radon comes from uranium which is present a variety of soils and natural stones, such as granite. When uranium breaks down, it emits radon. This toxic gas can make its way into one's home where it can accumulate and potentially be a major health hazard. To find out if radon is risk factor in your home, testing is available. To read more about radon and how to detect and mitigate it, as well as other resources pertaining to home safety, visit MakeItRight.ca.
From MakeItRight.ca:

RADON
A RADIOACTIVE GAS THAT CAN SEEP INTO YOUR HOME
THURSDAY MAY 15TH
Uranium is everywhere in the ground and in all kinds of soil, and when it starts to break down it creates a radioactive gas that is odourless, colourless and tasteless. This gas is radon.
When radon gas is released into the atmosphere, it gets diluted. But if it finds its way into your home it can accumulate, which is when it can become dangerous.
Being exposed to high doses of radon over a long period of time is a major health risk. According to Health Canada, radon is linked to about 16 percent of all lung cancer deaths in Canada. That makes radon the second leading cause of lung cancer after smoking.
Being a smoker significantly increases a person’s risk of developing lung cancer if they are also exposed to elevated levels of radon. For example, people who are only exposed to radon have a 1 in 20 chance of developing lung cancer whereas those who are also smokers have a 1 in 3 chance.
DID YOU KNOW…
It’s estimated that 2,000 people die every year in Canada due to radon. Think that’s bad? In the US it’s about 20,000!
From MakeItRight.ca:
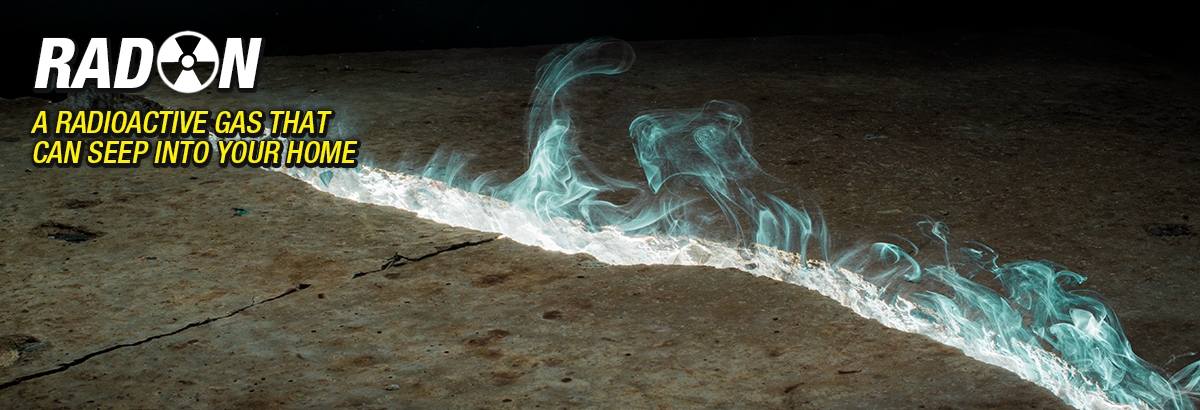
RADON
A RADIOACTIVE GAS THAT CAN SEEP INTO YOUR HOME
THURSDAY MAY 15TH
Uranium is everywhere in the ground and in all kinds of soil, and when it starts to break down it creates a radioactive gas that is odourless, colourless and tasteless. This gas is radon.
When radon gas is released into the atmosphere, it gets diluted. But if it finds its way into your home it can accumulate, which is when it can become dangerous.
Being exposed to high doses of radon over a long period of time is a major health risk. According to Health Canada, radon is linked to about 16 percent of all lung cancer deaths in Canada. That makes radon the second leading cause of lung cancer after smoking.
Being a smoker significantly increases a person’s risk of developing lung cancer if they are also exposed to elevated levels of radon. For example, people who are only exposed to radon have a 1 in 20 chance of developing lung cancer whereas those who are also smokers have a 1 in 3 chance.
DID YOU KNOW…
It’s estimated that 2,000 people die every year in Canada due to radon. Think that’s bad? In the US it’s about 20,000!
ENTRY POINTS FOR RADON

Soil
Windows
Cracks in walls & floors
Loose pipe fittings & support posts
Floor drains & sump pumps
Wall & floor joints
Ground water
RADON & YOUR HOME
Radon can seep into a home through pipes, windows, sumps, unfinished floors, cracks in foundation walls and floors—even through foundation walls. Remember, concrete is porous and radon is a gas. That means it can penetrate through the tiny holes in a home’s foundation walls.
DID YOU KNOW…
Some granite countertops emit radon. This is because granite is mined from the ground, where uranium and radon are also found.
RADON IN CANADA
Radon is measured in becquerels, which is a unit used to measure radioactive concentration. The Canadian guideline for radon dictates that a home should not contain more than 200 Bq/m3 or 200 units of becquerels per cubic metre. Before 2007, the national guideline for radon was 800 Bq/m3.
Between 2009 and 2010, Health Canada did a cross-country survey that revealed about 7 percent of Canadians are living in homes with radon levels above the guideline.
The survey also revealed that different parts of the country have different levels of radon. For example, Manitoba, New Brunswick, Saskatchewan and the Yukon had the highest percentages of radon, whereas Nunavut and Prince Edward Island had the lowest.
TESTING FOR RADON
Regardless of location, the only way to know if a home contains dangerous levels of radon is to test for it. One house can have radon levels next to zero while the house next door can have levels that are off the charts.
Radon levels also fluctuate depending on the weather, humidity, the home’s construction and the time of year. For example, winter is the best time to test for radon because windows and doors tend to be kept shut during most of the season, which allows any toxins in the home to build up. This provides a good reading on indoor air quality and radon levels a household is exposed to.
Homeowners can purchase radon test kits themselves, but testing for radon can be difficult. For example, radon detectors must be placed a certain distance away from interior walls, exterior walls, below the ceiling and above the ground. Do it the wrong way and the test results can be compromised.
Homeowners are encouraged to hire a professional to test for radon, such as a home inspector certified by the Canadian National Radon Proficiency Program (C-NRPP), in order to ensure accurate test results.
SHORT & LONG-TERM TESTING
There are short-term and long-term radon tests. A short-term test can last anywhere between 2 – 7 days, whereas long-term testing can last as long as 365 days.
Due to the fluctuations in radon levels, long-term testing provides a more accurate indication of a home's average year-round radon levels. For this reason Health Canada recommends long-term radon testing.
RADON TESTING REQUIREMENTS
Specific requirements must be followed when testing for radon. For example, all windows and doors must be kept shut as much as possible during the full duration of the test. This is why some homeowners choose to have their home tested while they are away.
In addition to maintaining closed conditions, the detector must be placed in the lowest area of the house that is occupied for at least 4 hours a day. It cannot be placed near any vents or where humidity is likely to occur, such as in the kitchen or bathroom. There also shouldn’t be any objects around the detector, which could obstruct its reading.
GETTING RID OF RADON
Reducing radon levels in a home can cost anywhere between $500 and $3,000. Some solutions involve installing a cap on sump pumps, or boosting up the ventilation in the home with something like a heat recovery ventilator (HRV), or sealing cracks in the foundation and around pipes and drains. Sometimes these solutions are enough, but other times they’re not.
The most effective way to reduce radon levels in a home is through a process called sub-slab depressurization. It involves drilling a hole through the basement floor (concrete slab) and installing a pipe with a fan. The fan draws radon gas from the ground and expels it through the pipe to a vent, usually located on the roof of the home.
If your home requires radon mitigation, make sure you hire a contractor who is certified by the Canadian National Radon Proficiency Program (C-NRPP) and who has plenty of experience reducing radon levels in residential construction.
DID YOU KNOW...
Soil
Windows
Cracks in walls & floors
Loose pipe fittings & support posts
Floor drains & sump pumps
Wall & floor joints
Ground water
RADON & YOUR HOME
Radon can seep into a home through pipes, windows, sumps, unfinished floors, cracks in foundation walls and floors—even through foundation walls. Remember, concrete is porous and radon is a gas. That means it can penetrate through the tiny holes in a home’s foundation walls.
DID YOU KNOW…
Some granite countertops emit radon. This is because granite is mined from the ground, where uranium and radon are also found.
RADON IN CANADA
Radon is measured in becquerels, which is a unit used to measure radioactive concentration. The Canadian guideline for radon dictates that a home should not contain more than 200 Bq/m3 or 200 units of becquerels per cubic metre. Before 2007, the national guideline for radon was 800 Bq/m3.
Between 2009 and 2010, Health Canada did a cross-country survey that revealed about 7 percent of Canadians are living in homes with radon levels above the guideline.
The survey also revealed that different parts of the country have different levels of radon. For example, Manitoba, New Brunswick, Saskatchewan and the Yukon had the highest percentages of radon, whereas Nunavut and Prince Edward Island had the lowest.
TESTING FOR RADON
Regardless of location, the only way to know if a home contains dangerous levels of radon is to test for it. One house can have radon levels next to zero while the house next door can have levels that are off the charts.
Radon levels also fluctuate depending on the weather, humidity, the home’s construction and the time of year. For example, winter is the best time to test for radon because windows and doors tend to be kept shut during most of the season, which allows any toxins in the home to build up. This provides a good reading on indoor air quality and radon levels a household is exposed to.
Homeowners can purchase radon test kits themselves, but testing for radon can be difficult. For example, radon detectors must be placed a certain distance away from interior walls, exterior walls, below the ceiling and above the ground. Do it the wrong way and the test results can be compromised.
Homeowners are encouraged to hire a professional to test for radon, such as a home inspector certified by the Canadian National Radon Proficiency Program (C-NRPP), in order to ensure accurate test results.
SHORT & LONG-TERM TESTING
There are short-term and long-term radon tests. A short-term test can last anywhere between 2 – 7 days, whereas long-term testing can last as long as 365 days.
Due to the fluctuations in radon levels, long-term testing provides a more accurate indication of a home's average year-round radon levels. For this reason Health Canada recommends long-term radon testing.
RADON TESTING REQUIREMENTS
Specific requirements must be followed when testing for radon. For example, all windows and doors must be kept shut as much as possible during the full duration of the test. This is why some homeowners choose to have their home tested while they are away.
In addition to maintaining closed conditions, the detector must be placed in the lowest area of the house that is occupied for at least 4 hours a day. It cannot be placed near any vents or where humidity is likely to occur, such as in the kitchen or bathroom. There also shouldn’t be any objects around the detector, which could obstruct its reading.
GETTING RID OF RADON
Reducing radon levels in a home can cost anywhere between $500 and $3,000. Some solutions involve installing a cap on sump pumps, or boosting up the ventilation in the home with something like a heat recovery ventilator (HRV), or sealing cracks in the foundation and around pipes and drains. Sometimes these solutions are enough, but other times they’re not.
The most effective way to reduce radon levels in a home is through a process called sub-slab depressurization. It involves drilling a hole through the basement floor (concrete slab) and installing a pipe with a fan. The fan draws radon gas from the ground and expels it through the pipe to a vent, usually located on the roof of the home.
If your home requires radon mitigation, make sure you hire a contractor who is certified by the Canadian National Radon Proficiency Program (C-NRPP) and who has plenty of experience reducing radon levels in residential construction.
DID YOU KNOW...
Ontario Tarion now covers radon remediation for the full 7 years of coverage. The push is for more new-home warranty programs to do the same.
Tuesday, May 13, 2014
Building Safety Month: Fire Extinguishers
May is building safety month, and Mike Holmes is promoting awareness by posting articles on his website, Facebook, and Twitter accounts about how to maintain a healthier, safer home. Today, Mike posted an article linked to his official website regarding fire extinguishers. When should we use fire extinguishers (as opposed to or in conjunction with calling the fire department)? How many should we have in our home? Where should we keep them? These are questions that Mike addresses in detail in his article, "Fire Extinguishers: A Safety Tool For Every Home." Mike also explains the differences between the three basic classes of fire extinguishers and informs readers of how and when they're used. These are important factors to consider when choosing extinguishers and their placement in your home. Once you have the right extinguisher in your home, it's important to maintain them and have them inspected at least once a year by a professional. However, just as we periodically check the batteries in the smoke alarm, it's important to perform periodic checks on your fire extinguishers to make sure they are operating optimally at all times.
When emergency strikes, it's important to have a game plan. Fire extinguishers are a big part of that game plan and an important piece of safety equipment that no home should be without.
From MakeItRight.ca:

When emergency strikes, it's important to have a game plan. Fire extinguishers are a big part of that game plan and an important piece of safety equipment that no home should be without.
From MakeItRight.ca:

Fire Extinguishers
A safety tool for every home
Thursday May 8th
Fire extinguishers are important safety tools. When used properly they can help put out a small fire or contain it until firefighters arrive.
Fire extinguishers do not replace the need to call Fire Services. No matter how small a fire might seem, you should always call 9-1-1 first.
HOW MANY?
There should be fire extinguisher on every floor of your home but the total number of fire extinguishers you should have depends on the size and features of your house. For example, every home should have a fire extinguisher accessible in areas where blazes are most likely to start, such as in the kitchen and garage. If a home has more than one kitchen—one on the main floor and perhaps one in the basement—there should be a fire extinguisher located near both, as well as in other areas.
WHERE?
Fire extinguishers should be installed in plain view, beyond the reach of children, near an exit route and away from stoves and heating appliances. Have them handy on every floor of your home, including kitchen areas, the garage/workshop, and at the top of the basement stairwell.
Class A: For fires involving ordinary combustibles, such as paper, wood, drapes and upholstery.
Class B: For fires involving flammable liquids, such as gasoline, oils, solvents, paints and flammable gases.
Class C: Electrical fires that involve class "A" or class "B" materials, as well as live electrical power. This includes overheated wiring, fuse boxes, stoves, etc. No extinguisher gets a Class C rating without a Class A and/or Class B rating.
Some extinguishers can be used on more than one type of fire, so these extinguishers will be labeled with more than one letter appearing in a horizontal sequence, such as A-B-C or B-C. An ABC dry chemical extinguisher can handle most common household fires, from grease to electrical.
There are also Class D and Class K fire extinguishers, but these extinguishers are not common in residential homes.
Class D: For fires involving combustible metals, such as magnesium, titanium, potassium and sodium. For that reason they are usually found in laboratories.
Class K: For fires involving cooking oils, trans-fats or fats that can build-up on (or in) cooking appliances. These extinguishers are usually found in cafeteria kitchens and restaurants.
CHECKING FIRE EXTINGUISHERS
Every fire extinguisher must be inspected at least once a year by a professional and it must have a tag on it that indicates when it was last inspected and by whom. Check the tag to make sure the extinguisher has not expired.
In Canada, every fire extinguisher must also be tested and listed by the Underwriters' Laboratories of Canada (ULC). Make sure the ULC label appears on the extinguisher.
You should also be checking the extinguisher yourself every month—just like your smoke alarms and CO detectors. A quick check is easy, but always refer to the operator’s manual first.

To check:
USING A FIRE EXTINGUISHER
Remember “P-A-S-S” when using a fire extinguisher to contain or put out a small fire in your home:
Fire extinguishers do not replace the need to call Fire Services. No matter how small a fire might seem, you should always call 9-1-1 first.
HOW MANY?
There should be fire extinguisher on every floor of your home but the total number of fire extinguishers you should have depends on the size and features of your house. For example, every home should have a fire extinguisher accessible in areas where blazes are most likely to start, such as in the kitchen and garage. If a home has more than one kitchen—one on the main floor and perhaps one in the basement—there should be a fire extinguisher located near both, as well as in other areas.
WHERE?
Fire extinguishers should be installed in plain view, beyond the reach of children, near an exit route and away from stoves and heating appliances. Have them handy on every floor of your home, including kitchen areas, the garage/workshop, and at the top of the basement stairwell.
TYPES OF FIRE EXTINGUISHERS
There are 3 basic classes of fire extinguishers—A, B and C. Each class fights a different type of fire, so it’s important to use the right extinguisher for the type of fire you are attempting to contain or put out.Class A: For fires involving ordinary combustibles, such as paper, wood, drapes and upholstery.
Class B: For fires involving flammable liquids, such as gasoline, oils, solvents, paints and flammable gases.
Class C: Electrical fires that involve class "A" or class "B" materials, as well as live electrical power. This includes overheated wiring, fuse boxes, stoves, etc. No extinguisher gets a Class C rating without a Class A and/or Class B rating.
Some extinguishers can be used on more than one type of fire, so these extinguishers will be labeled with more than one letter appearing in a horizontal sequence, such as A-B-C or B-C. An ABC dry chemical extinguisher can handle most common household fires, from grease to electrical.
There are also Class D and Class K fire extinguishers, but these extinguishers are not common in residential homes.
Class D: For fires involving combustible metals, such as magnesium, titanium, potassium and sodium. For that reason they are usually found in laboratories.
Class K: For fires involving cooking oils, trans-fats or fats that can build-up on (or in) cooking appliances. These extinguishers are usually found in cafeteria kitchens and restaurants.
CHECKING FIRE EXTINGUISHERS
Every fire extinguisher must be inspected at least once a year by a professional and it must have a tag on it that indicates when it was last inspected and by whom. Check the tag to make sure the extinguisher has not expired.
In Canada, every fire extinguisher must also be tested and listed by the Underwriters' Laboratories of Canada (ULC). Make sure the ULC label appears on the extinguisher.
You should also be checking the extinguisher yourself every month—just like your smoke alarms and CO detectors. A quick check is easy, but always refer to the operator’s manual first.
To check:
- Make sure the pin is intact. The pin is meant to stop you from grabbing the extinguisher and accidentally releasing the agent. Also check the extinguisher for dents, leaks, rust and any other signs that it might need to be replaced.
- Check the tamper seal. Its purpose is to verify that the extinguisher hasn’t been tampered with. If it’s broken, it could mean that the extinguisher has been used. If the extinguisher has been used or the seal is broken, replace the extinguisher or have it professionally inspected.
- Check the pressure. Every fire extinguisher should have a gauge. If the needle on the gauge is the green zone it means that the extinguisher is fully charged. If the needle is below the green zone, it needs to be recharged or replaced. To recharge or replace a fire extinguisher contact the association that appears on the tag.
- Tip it upside down. The agent inside the extinguisher can settle at the bottom—it has the consistency of flour and can easily get packed over time. Turn the fire extinguisher upside down a few of times to break up the agent inside.
USING A FIRE EXTINGUISHER
Remember “P-A-S-S” when using a fire extinguisher to contain or put out a small fire in your home:
- P ULL out the locking pin, which breaks the seal. Some extinguishers use different release devices, so always refer to your operator's manual before using the extinguisher.
- A IM the nozzle or hose about 3 metres or 10 feet away from the base of the fire.
- S QUEEZE the trigger handle to release the extinguishing agent.
- S WEEP the extinguisher from side to side, moving it front to back, across the base of the fire until it appears to be out. Wait and keep your eyes on the area because the fire could reignite. If so, repeat the process. Never turn your back on a fire even if you think it’s out.
Monday, May 12, 2014
Celebrating Mother's Day, Holmes-Style
So how did Mike's kids, Sherry and Mike Jr., spend Mother's Day? With their mom, of course! They both Tweeted photos of themselves with their mom, Alexandra, on Sunday. "Happy Mother's Day to my mom and my Hero. Love you mom" said Mike Jr. about his mother. Sherry invited her Twitter followers to "meet her mommy," posting "Happy Mom's day! Thanks for making me #meetmymommy". This is as far as I can tell the first time we've seen a true photo of Mike Holmes' ex-wife. It's very apparent who in the family gets their looks from who now! Thanks, kids, for inviting us to meet your mommy!


Sunday, May 11, 2014
Happy Mother's Day From the Holmes Spot
We hear a lot about Mike's dad and how he was a strong figure in Mike's life, but what about his mom?
Mike described his mom Shirley as an intelligent woman who was ahead of her time - not your typical 60's mom. “My mom was my really good friend," he stated in a TV interview. He also described her as the type of mom who could backhand all three of her children in one smooth move. What a woman!

Mike described his mom Shirley as an intelligent woman who was ahead of her time - not your typical 60's mom. “My mom was my really good friend," he stated in a TV interview. He also described her as the type of mom who could backhand all three of her children in one smooth move. What a woman!
Happy Mother's Day from the Holmes Spot!
Friday, May 9, 2014
Mike Holmes: Safety Sense for DIYers
D-I-Y. Three letters that strike both fear and excitement in homeowners all over the globe. As a rule of thumb, Mike Holmes is typically against most DIY projects. Why? Because many homeowners lack the know-how to do the job safely and correctly. When it comes to large projects, Mike recommends that people leave it to the pros, but for small jobs such as painting and minor repairs, it's important to take the right precautions before doing it yourself. Mike Holmes has told the story before about a mishap with a table saw that nearly cost him his sight. When he was 22 years old, he ran a board with a knot in it through a table saw, and a chunk of wood flew at his face, hitting him just below his eye. The incident left him with a shiner, and also taught him the importance of using safety equipment such as safety glasses. Regardless of the task, if there's dust and debris flying through the air, you should be protecting your eyes. DIY projects, big and small, can be dangerous, so it's important to use some safety sense before tackling a job. If it's loud, protect your ears. If there's debis or fumes in the air, protect your eyes and lungs. If it's sharp, wear gloves. Safety is a no-brainer, and it takes very little time and effort to use some basic PPE (personal protective equipment). There's no excuse for not taking appropriate precautions, especially when the consequences for not doing so could be grave.
From the Montreal Gazette:
Mike Holmes: Safety sense for DIYers
No job too small to take precautions
 With spring here, many of you will be starting to take on home projects. My advice: Leave the bigger, more complicated jobs to the professionals, because you could do more damage than good.
Planning minor projects around the house — such as painting, drywall repairs, finishes, trim work or even gardening? You might think a small job isn’t dangerous, but no job is safe without the right protection and protocols. Follow these tips to stay safe:
Wear safety gear. If you’re sawing, sanding or drilling you’ll need protective eyewear and a respirator, especially if there’s debris and dust flying around. There are different respirators for different jobs — make sure you wear the right one. Also, if you’re using loud tools you’ll need ear plugs or earmuffs (not the kind you wear in winter.) Don’t wait to lose your hearing to start protecting it!Don’t use gas-powered tools in enclosed areas. You need plenty of ventilation, and opening a window or door isn’t going to cut it. No amount of carbon monoxide (CO) is safe. People have suffered serious neurological damage because they didn’t know better.
Beware hazardous fumes. Some people think because a label has “green” on it the product is safe. Not the case. Look at paints. The label might say it’s low-VOCs (volatile organic compounds) or VOC-free, but the pigment added to it could contain VOCs. Also, a VOC-free label doesn’t mean you can paint with the doors closed.
Always make sure you have enough ventilation and always use the right respirator, no matter how small the job or the type of paint you use.
Consider asbestos. Considering doing repairs to plaster or stucco in a home built before 1980? Be careful; it could contain asbestos. If it does, don’t disturb it — that means no sanding, no chipping, no chiselling, nothing. Disturbing asbestos releases tiny asbestos fibres into the air. If you breathe them in they get lodged in your lungs.
We stopped using asbestos in the late 1970s, but it can be found in many homes built or renovated before then. It can be in attic insulation (vermiculite), ceilings tiles, drywall, plaster, textured paints, vinyl tiles — including the adhesives used to install them — and insulation around pipes, ducts and hot water tanks.
If you’re not sure if your home has asbestos, call in a professional testing and abatement company.
Wear proper clothing.No shorts and sandals. Wear steel-toe work boots when doing landscaping or moving heavy stones. Too many broken or injured feet could have been avoided. Wear proper clothing made from thick material, like duck canvas, because even while doing simple jobs you can walk by something sharp. Use knee pads — you’ll appreciate it when you’re older.
And keep your hair tied back — guys too — especially when using power tools. Make sure you can see what you’re doing and nothing is in your way.
Keep it clean. One day I was helping my dad gut a room and the floor got completely covered with garbage. My dad told me to stop and clean it up, but I was almost done so I told him I’d clean up later. I needed to pull down the rest of the ceiling so I grabbed a chair. What I didn’t know was one of the legs was standing on top of debris that was covering a hole in the floor for the heat register.
When I stood on the chair the leg went through the hole and I hit the ground. The first thing my dad asked was if I was OK. The second thing was, “Does that teach you anything?”
Safety is a no-brainer. How long does it take to put on safety gloves, safety glasses and a respirator? Now think about how long you would have to live with the consequences of an accident, or breathing in toxic chemicals or debris? There’s no comparison.
Watch Mike Holmes on Holmes Makes It Right on HGTV. For more information visit makeitright.ca.
© Copyright (c) The Montreal Gazette
Subscribe to:
Posts (Atom)